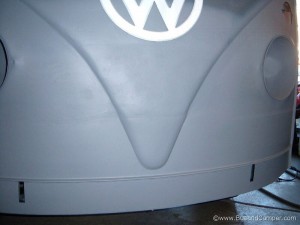
Complete bottom 6 inches replaced and rebuilt – face lift anyone
Lenoir – Splitscreen lower nose rust repair and replacement
Lenoir, our 1965 vw Bus is in desperate need of replacement panels up front and low, here we’re going to take a look at how the repairs were done..
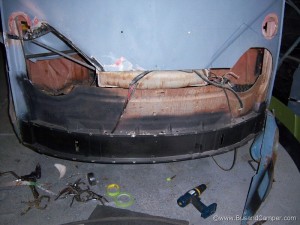
This is what we started with – not a very pretty sight and there’s some more material to remove before we can start adding back good metal. The lower inner valence is removed, you can just see on the floor is the new Gerson funky green about to go in. The a-post is also removed and awaiting Gerson replacement;
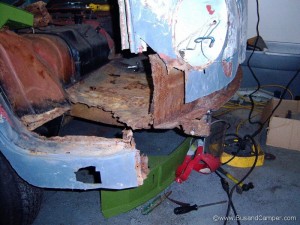
Here the inner valence is offered up Klassic Fab KF37, there is a return flange that the inner kick panel connects to and then the frame horns butt up to the other side of this panel. All areas cleaned ready for welding. Here we also see Randy has removed the headlight bucket – there was obviously rust in the bucket seams which are only repaired with replacement. The thick looking wire coing up through the inner kick panel is the main wiring loom – be careful to not melt this or cut through it – replacement is time consuming. Also seen is the a-pillar repair KF14 offered up, with the door rehung to see how the gaps and structure looks around the door;
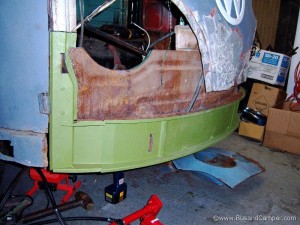
With the inner valence attached and a-post welded in, here we see how Randy handled the nose panel. A sacrificial nose panel was bought with good headlight bucket and here we see the left and right side have been cut ready to be welded in. Note how the nose is peppered with nail gun holes – clearly this bus had some trauma in it its life and the typical repair is with nail guns to ‘pull’ the dents out. Even more so when you cant get to the other side of the dent to use a hammer and dolly. This is going to be interesting;
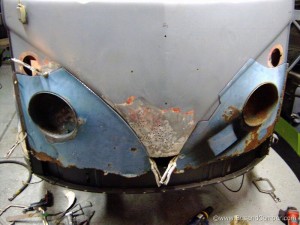
So off with its nose to be plug welded and repaired. Here we also see the inside construction of a splitscreen camper – the inner kick panel has cut outs for headlight buckets and also links the left and right a-posts for strength. The section above the inner kick is the heater outlet vent coming from the floor. Also note the wiring looms. At the bottom of the original kick panel are several drain holes where condensation / windscreen leak water is meant to drain away through the inner valence and out the bottom. Nice water trap and probably why so many Buses are rusted out in this area;
Here we see the donor left and right headlight buckets tacked into place, the nose peak has been plugged and straightened and then tacked into place too. Quite some effort to get this far. Gersons KF44 is in place as the outer lower valence and then a Gerson KF49 lower 8 inch nose repair, some clamps, a Kleko to hold some seams together and this is starting to look like a real van again, note the flanges on the outside of the nose panel, this particular funky green panel normally comes up to just below the lights but this has been cut down a little to utilise more of the donor panels;
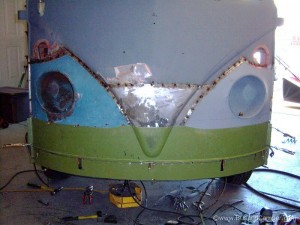
Without making a step in the panels it is necessary to butt the two pieces of metal together and then stitch with welds building up to Seam welding – basically continuous welds but only short distances at a time, this is a skill. So the sacrificial buckets are welded, ground down flat and then seam sealed with 2 part NASCAR spec epoxy to give it strength and water proofing. Here we see the lower KF44 and KF49 panels welded in place – almost finished;
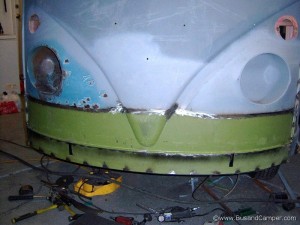
And the finished repair – all welds ground flat, seam sealed and primered – looks like a proper Splitscreen bus by Volkswagen again;
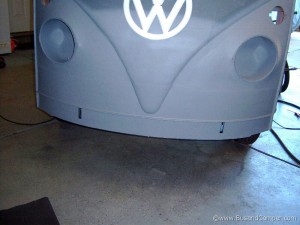
Side profile shows where the panels join – to get this perfect will require a very slight skim of filler, and this is normal. This level of repair and reconstruction is time consuming and requires a level of skill and patience. Good work;
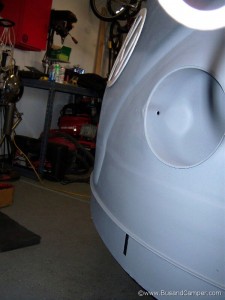
And finally up close and personal;
