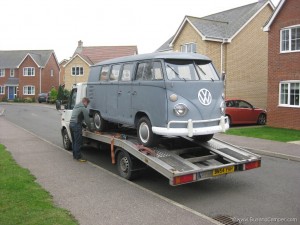
The steps to getting an MOT, UK plates and then FOR SALE
Lenoir our Splitscreen 11window MOT and Sale
Getting Lenoir ready for sale meant going through lots of the smaller details to make ready for an MOT and then registering for UK plates with the DVLA.
This is the link to the for sale page VW Camper for sale.
Once the engine was running it was time to finish off the wiring round the back to be UK legal – this meant going through the conversion to separate indicators and their housings. Sourcing good quality rear european housings – the Hella variety is getting progressively more difficult. Fortunately the rear lenses are being remade in Hella and are really good quality. Running the 2 extra wires from left to right is the majority of the conversion, the other part is to put the brake wire on one of the side light wires to the back of the bus. All detailed here; VW Camper Repair – converting rear lights. This is work in progress;
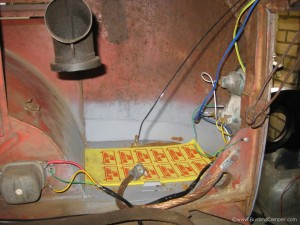
Whilst at the rear of the Bus, for MOT we made sure the rear number plate light was working, check the grounds, replaced the voltage regulator, made sure the choke and cut off solenoid were working ok, and finally for peace of mind fitted a new battery, strap and acid mat. We fitted heater tubes, hooked up the arms on the German heater boxes and made ready for getting the heaters to work. The fun part was pushing the vacuum hose virtually the full length of the heater tube to extract what seems to have been a storeroom for nut shells. While at the rear of Lenoir we made sure the handbrakes and rear brakes were all adjusted up, not quite on the handbrake so off with the rear drum – we use a 3/4 inch drive breaker bar for the 46mm nut and a little propane torch on the nut to free it off. Here we see the previous owners refusal to buy a new handbrake cable – why not repair it with a coat hanger instead. Oh dear.
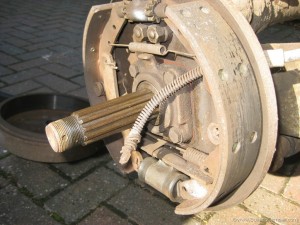
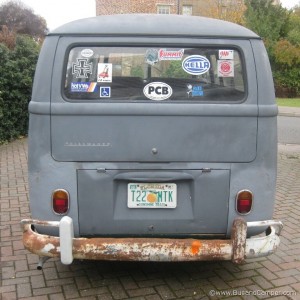
Needless to say we replaced both handbrake cables both sides, cleaned the drums and assemblies, lubed the adjusters made sure the shoes and cylinders were recent and re-assembled with a little copper slip and a large new cotter pin. The finishing touch at the rear was to fit correct US spec slash cut Bumper and over-riders. Getting hold of rear bumpers is getting more difficult, and here for Lenoir we had to use a new left rear over-rider to complete the bumper. The original German bumpers are very strong and not easily dented or abused – only professional grade presses can straighten the dents in this bumper. US spec refers to the presence of over-riders and the towel rails on the bumper. Slash cut describes the angle at the end of the bumper and is correct for 58 or so through to 66 or so VW Campervans. This is the finished Bus at the rear;
Moving to the front of the bus we had several challenges here. First up is to get the heaters working, nothing worse then trying to drive a bus in the cold and having nothing to defog the front window. The trick with the heater knob is to unscrew the knurled knob without having to take the pin out. Out with the old cable hoping none of the tubes were crushed or blocked for the cable to extract. New cable goes in and the temptation is to push but the slightest kink on the solid cable will compromise its performance. We now have working heaters – WOW. Anyone who has a splittie will almost certainly realise how much work goes into getting hot air to the front of a Bus. Here we have the parts in pieces ready to go back together;
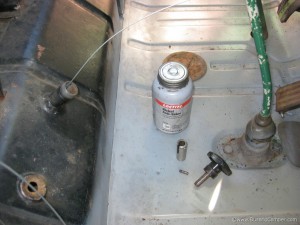
Next up was the mess of wiring, re-terminating the headlight connectors with proper insulated crimps and heatshrink was easy compared to chasing the wiring through behind the dash. A replacement Bus speedo was sourced, as were nearly all the right switches on the dash and finally a correct Split ignition and key were all sourced as the original parts were incorrect, damaged or plain junk. A replacement indicator that latches and clamps to the column are getting more difficult to find too. For this era of Splitscreen there is a seemingly complex hazard warning light arrangement. The MOT manual states that the hazard lights should work without the key in the ignition. Also that there should be a dash warning light to show the hazard lights are in operation. The MOT manual then says the indicators should operate with a the driver’s ‘tell tale’ warning device – this is the light in the speedo. Suffice to say getting this combination to work 100% took patience and attention – either the speedo tell tale light would glow with no ignition key or plain not work with ignition on. We tried 2 pin, 3 pin and 4 pin relays, even 3 types of 4 pin relay – all displayed one issue or other. Finally we solved the ‘tell tale light in the speedo glowing’ issue by changing the relay to a 4 pin and then swapping out the power to the speedo tell-tale bulb for a grounded connection. Voila. Although not 100% following the VW wiring diagram we have a 100% correct for the MOT setup.
Also up front the wipers needed drastic attention. The spindles were badly corroded and the motor ran just about all the time. A complete overhaul of the motor was performed where we replaced the spindles and the 6v motor changed out to 12V. With new spindles the tall body wiper arms worked better and had smoother action. Finally up front we made sure the gas gauge with its new sender out back worked well. All is good with the tell tales or idiot lights on the speedo, the new 12v horn worked, the lights all worked once we put the dimmer switch back on the replacement floor. This is the finished dash – new church key and holder, new ABS kick panels, new rubber mat, washer bottle – everything works;
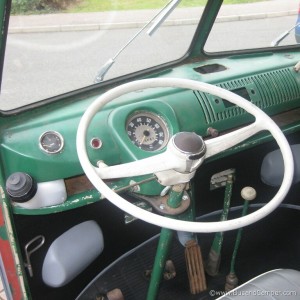
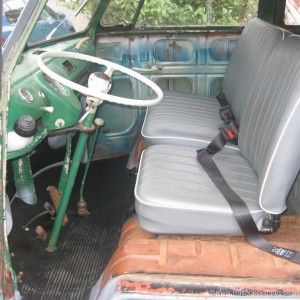
Seatbelts – the minimum for the MOT for this ear or year vehicle is at least a set of lap belts and whilst there are methods for fitting 3 point this involves cutting a hole in the b pillar down low and then feeding the nut plate up the pillar round the latch to the top anchor area. This would be the next best thing to. This is the finished front cab area.
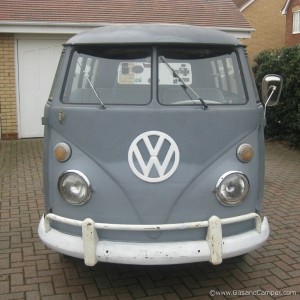
This is the front view, all finished off with a correct US spec front lash cut bumper;
Here we restored a pop out window. Removing and replacing op outs can be daunting, plenty of WD40 soaked over time helps. Then for installation we do ours with two people – one to push the frame into the corner and the second to get those fiddly little screws in. Tip is to clean the little screw threads before so the new screws go in nice and easy. Final tip is to use a thin plastic card to slide under the seals to get them to seat right.
Finally we had everything working for the MOT, which it passed first time, 2 advisories – steering tie rods and front dampers. This was the day before MOT;
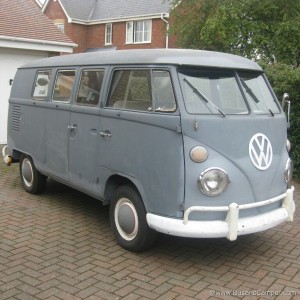
Armed with an MOT, a cover note from RH Insurance, a complete V55 and our customs form C&E 386 we registered Lenoir in the UK. 5 days later we get the permission to print number plates form – Lenoir is now FAV269C. Job done, listed for sale on theSamba and SSVC.
And sold in 3 days, off to be converted to a real nice touring Camper – fantastic;
